Launch checklist
What your store needs before it can go live, and how to launch it.
Getting started · Updated 14 Nov 2026
Until you launch, visitors see a Coming soon page and nobody can buy. The dashboard's Set up list tracks what's left.
What you need before launching
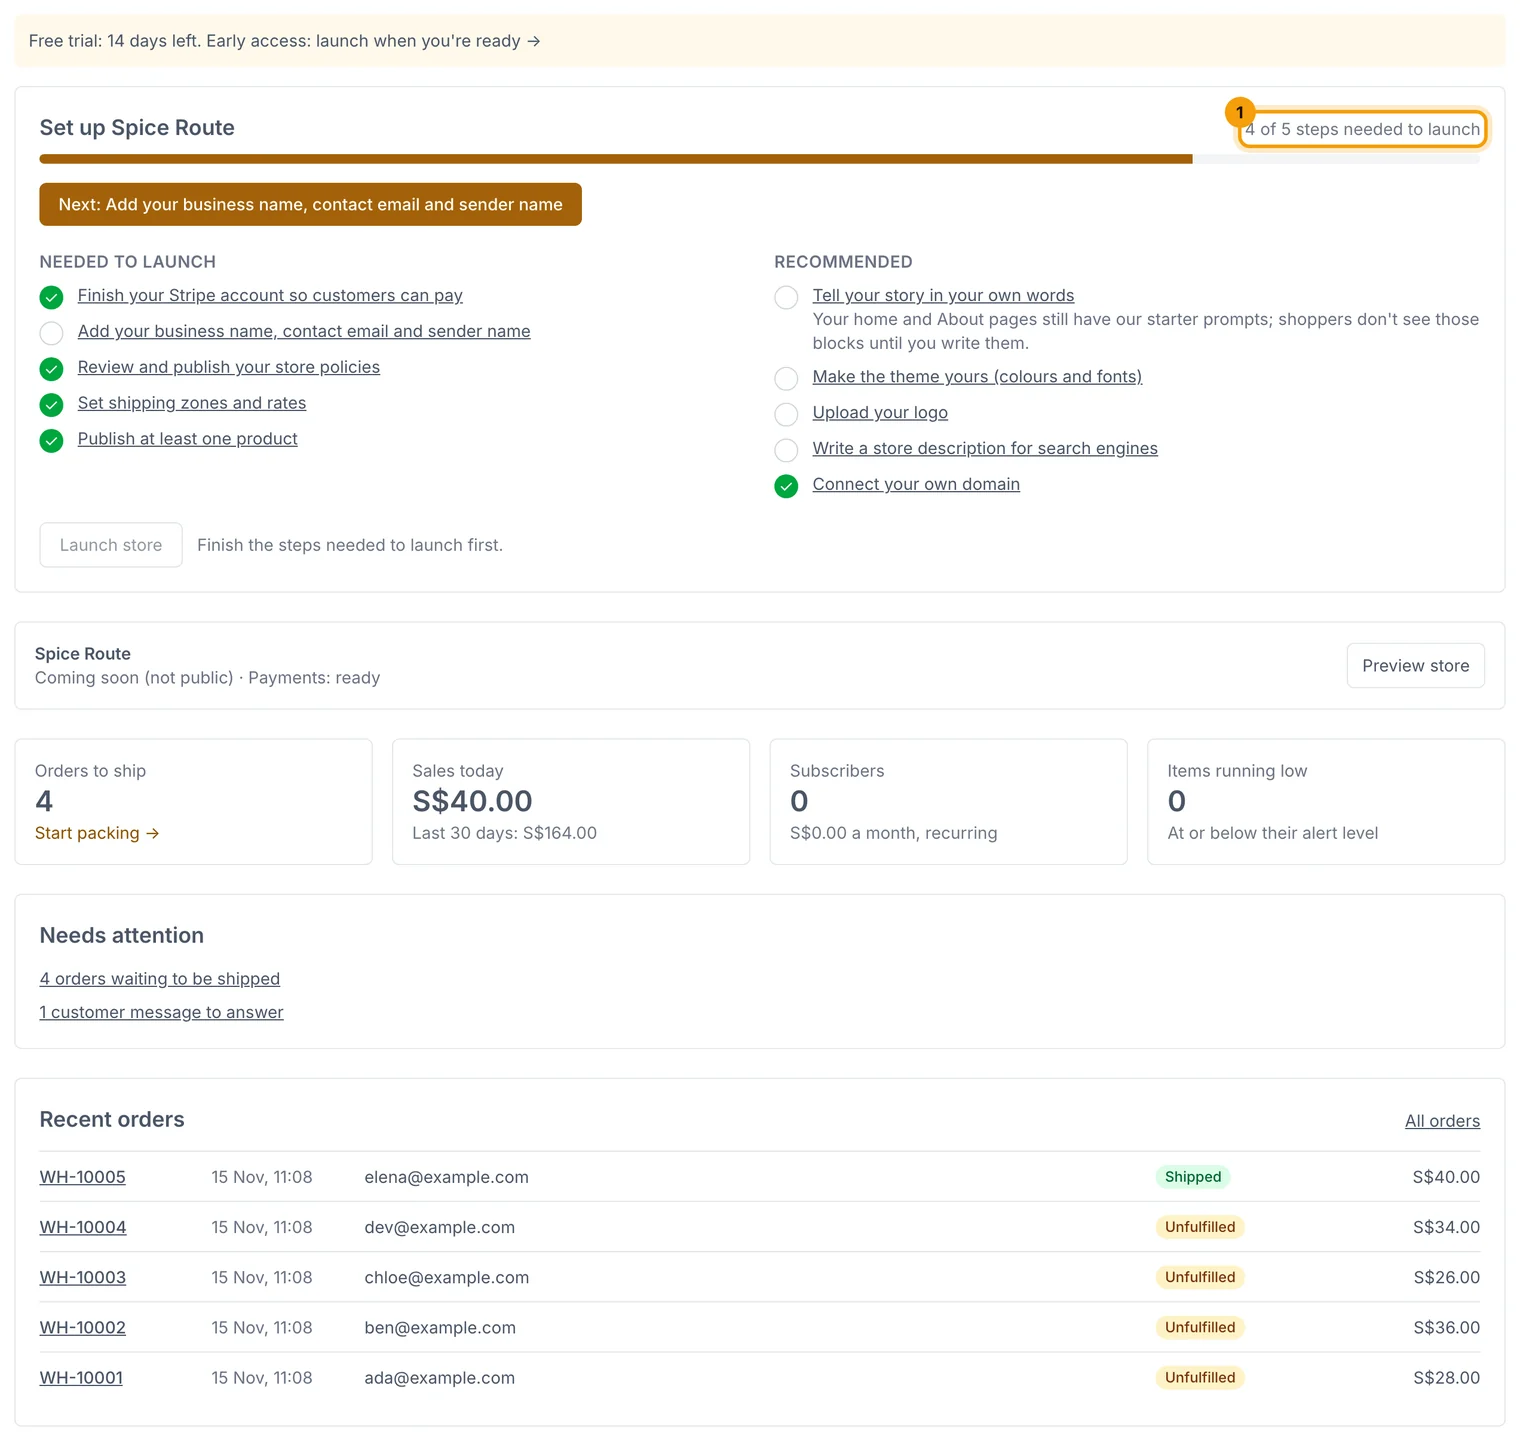
Needed to launch:
- Connect Stripe to take payments (see Connect Stripe).
- Add your business name, contact email and sender name in Store settings.
- Review and publish your store policies: terms, privacy and returns.
- Set shipping zones and rates, if you sell anything that's posted (see Shipping zones and rates).
- Publish at least one product. Sample products don't count.
- Choose a plan (during early access or your trial this may already be done).
Recommended: upload your logo, make the theme yours, tell your story, write a store description for search engines, and connect your own domain.
Launch
- Open the dashboard. When every needed step is ticked, the Launch store button turns on.
- Choose Launch store. Your shop opens to everyone straight away.
Related guides
- Create your store
Sign up, name your store, pick a theme and colours, and find your way around the console.
- Connect Stripe
Take card, Apple Pay and Google Pay payments straight into your own Stripe account.
- Shipping zones and rates
Group the countries you post to, set prices by weight, offer free delivery over an amount, and block products from some countries.
- Add products, sizes and photos
Create a product, give it sizes with their own price and stock, add photos, and publish it.
Still stuck? Contact support or email [email protected]. We reply within one business day.