Add products, sizes and photos
Create a product, give it sizes with their own price and stock, add photos, and publish it.
Products · Updated 14 Nov 2026
Each product has a name, a description, one or more sizes (each with its own price, weight and stock) and photos.
Create the product
-
Open Products and choose Add product (1).
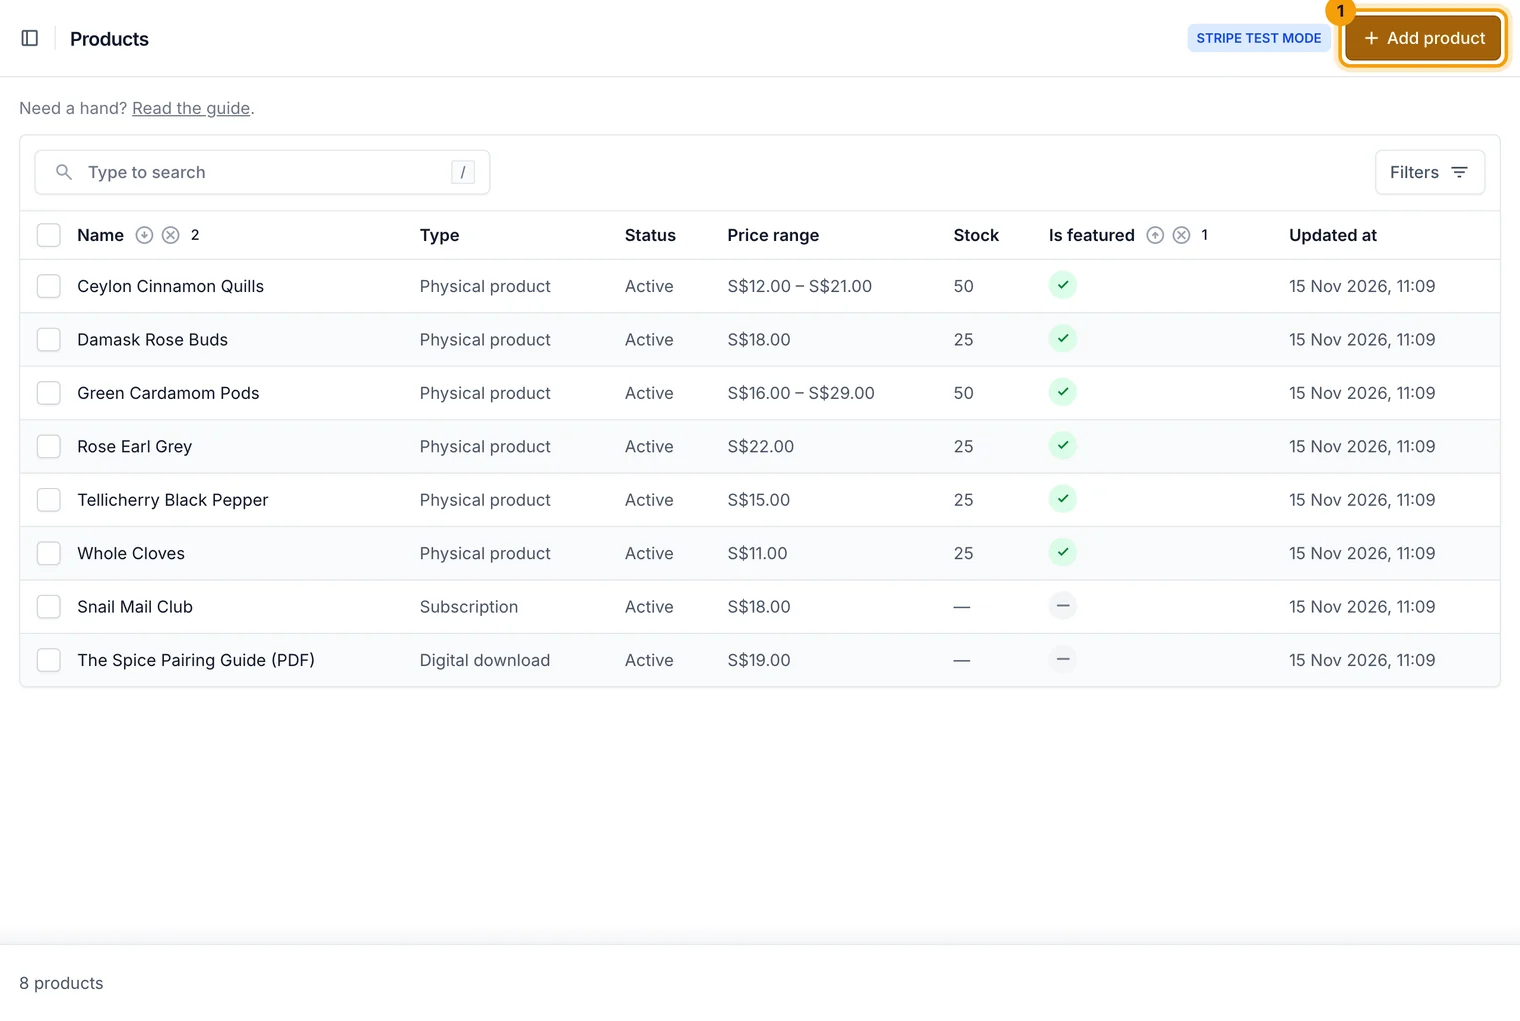
Your products, with price range, stock and status. -
On the General tab, enter the Name (1) and choose the Type (2): a physical product you post, a digital download, or a subscription.
-
Write a Short description: one or two lines shown under the name and used by search engines.
-
Tick the Categories it belongs to.
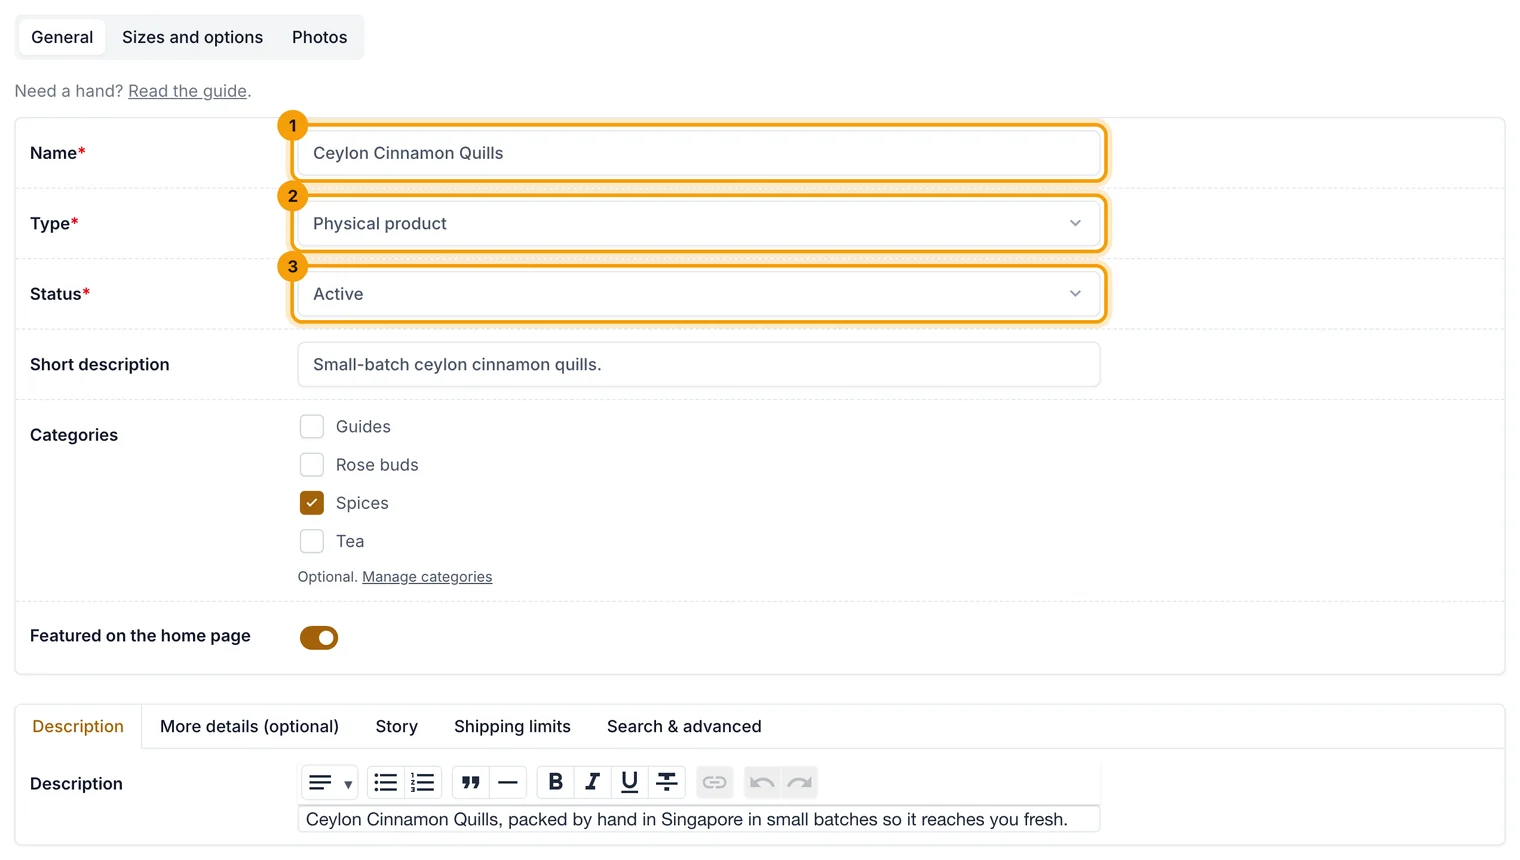
The General tab holds what every product needs.
Add sizes and options
- Open the Sizes and options tab.
- Add a row for each size, such as 50 g or 100 g, with its label, price, how many you have in stock, its weight in grams and an SKU (your own code for it).
- Set an alert level to get an email when that size runs low. A size that sells out can't be bought until you add stock.
Add photos
- Open the Photos tab and add one or more photos. The first one is the main photo.
- For each photo, describe what it shows in Alt text, such as "Cinnamon quills tied with string". Screen readers read it aloud and Google uses it.
Publish
- Set Status to Active to put it on sale. Draft keeps it hidden while you work on it.
- Choose Save.
Related guides
- Organise products into categories
Group products (Spices, Tea, Gifts…) so shoppers can browse them and search engines can find each group.
- Track stock
How stock goes down and up, low-stock alerts, and how to record a delivery or a breakage.
- Get found on Google (SEO)
Your SEO score and checklist, search titles and descriptions with live previews, hiding pages, and fixing broken links.
Still stuck? Contact support or email [email protected]. We reply within one business day.