Create your store
Sign up, name your store, pick a theme and colours, and find your way around the console.
Getting started · Updated 14 Nov 2026
Your store is ready to build in a couple of minutes. It stays private (it shows a Coming soon page) until you launch it, so take your time.
Sign up
-
Go to app.wildhoney.io/signup and enter your email (1), then choose Start my free trial (2).
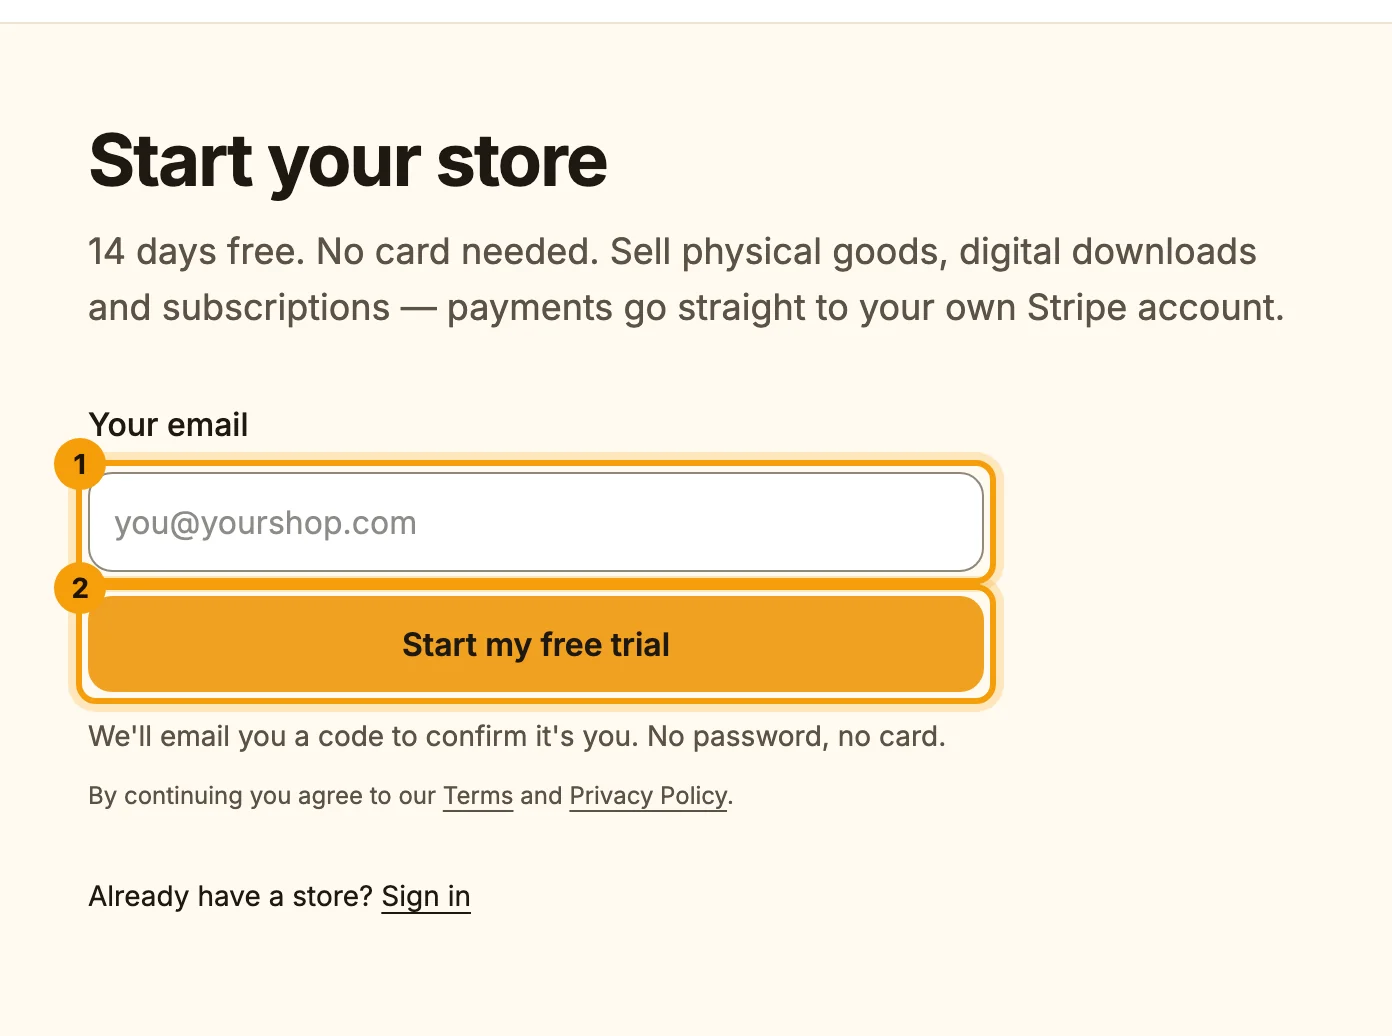
Sign up with your email. There's no password: we email you a code. -
We email you a six-digit code. Type it in to confirm it's you.
Tell us about your store
-
Give your store a name (1). Its address on wildhoney.io is filled in for you; you can change it before you continue.
-
Pick your country and what you sell.
-
Under Choose a theme (2), pick the look you like. You can switch themes or change colours later.
-
Tick that you agree to the terms, then choose Create my store (3).
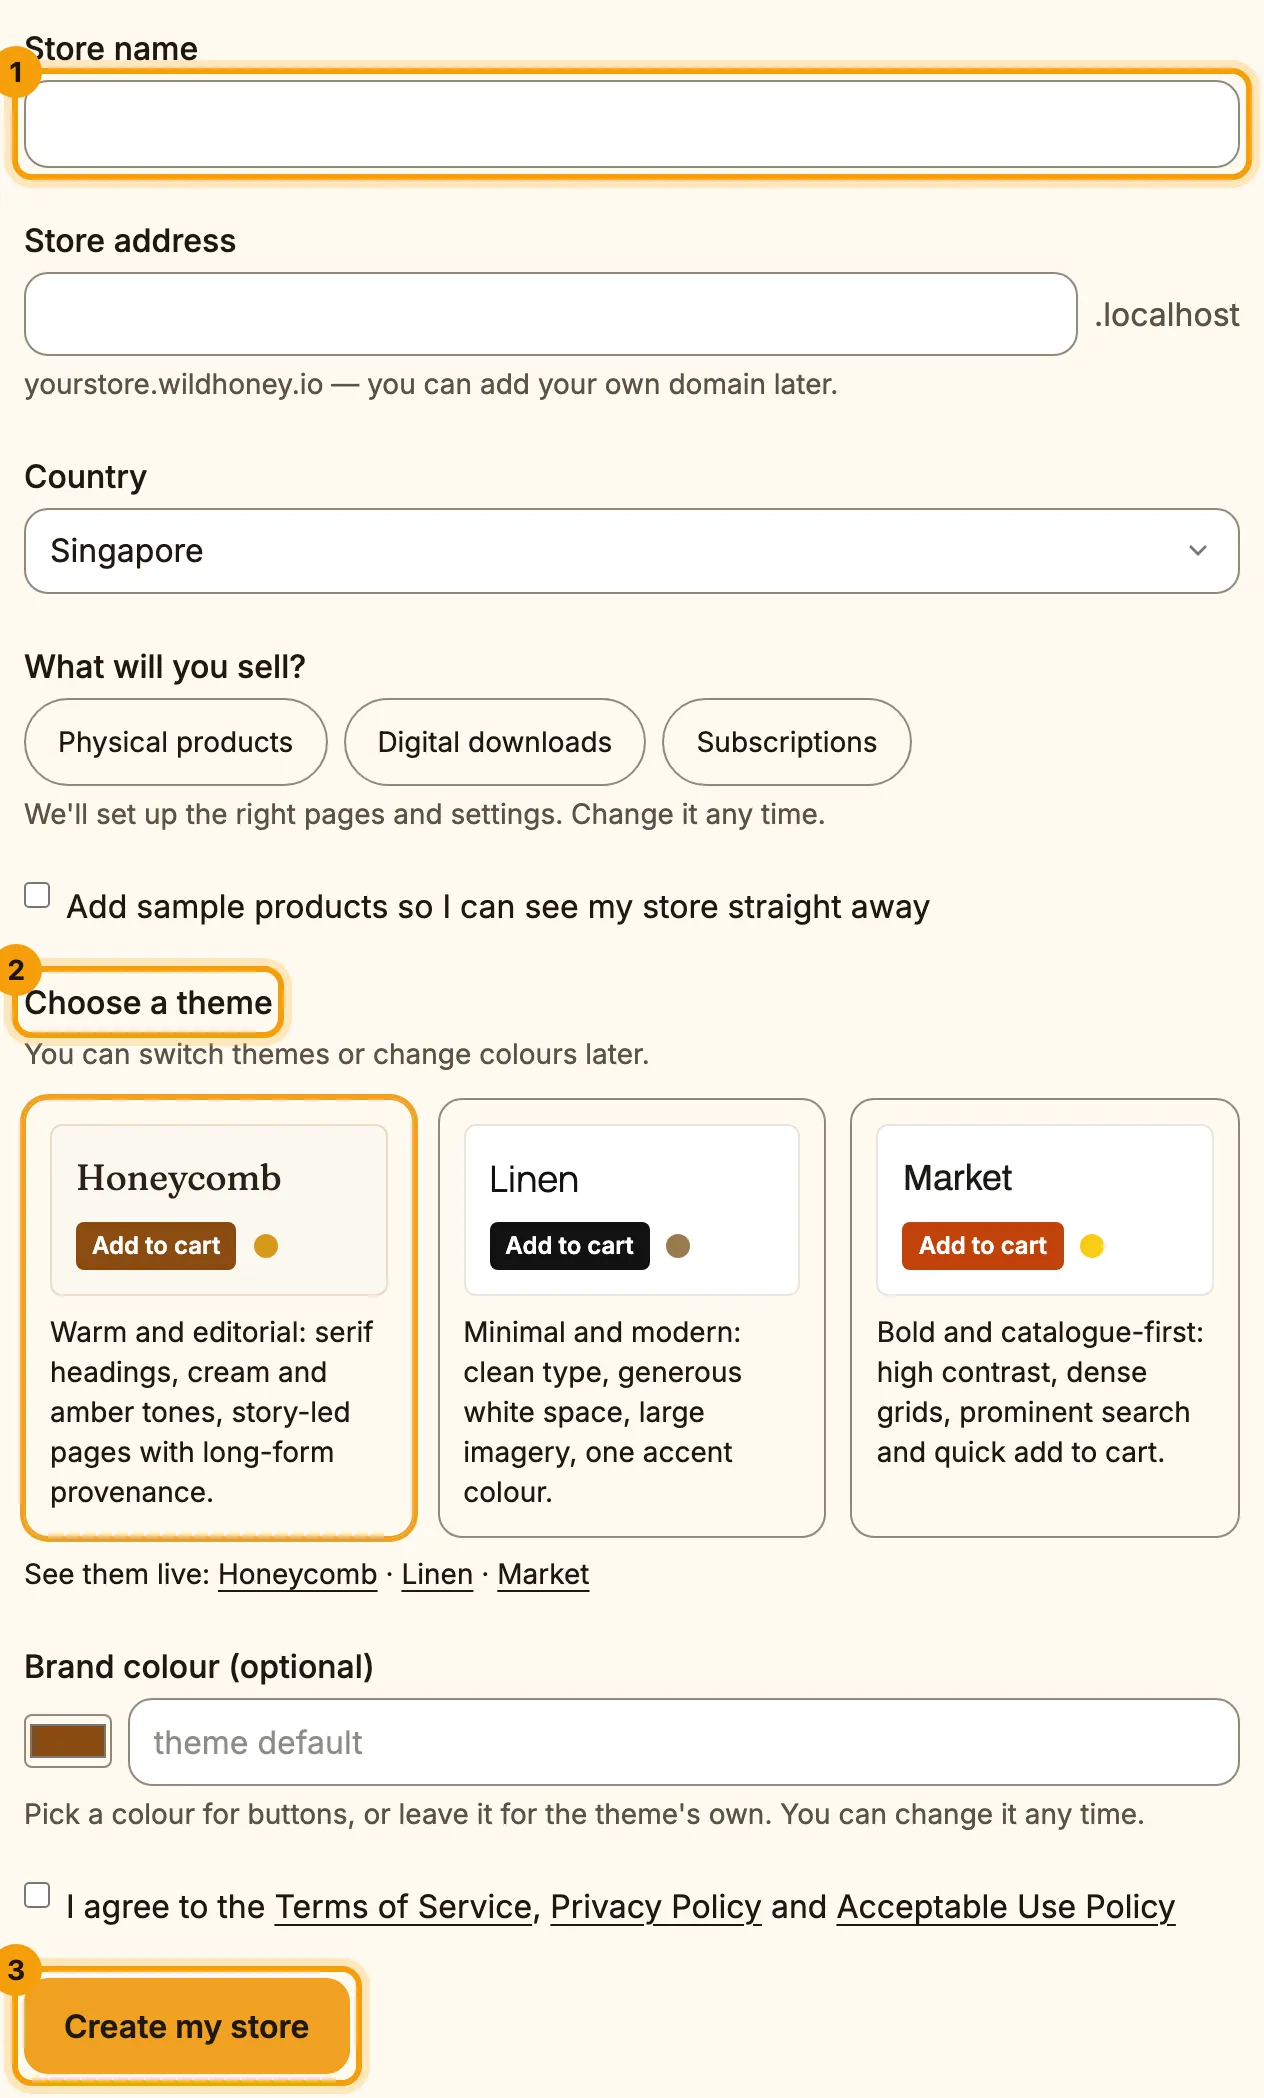
Name, country, what you sell and a theme: that's all we need to start.
Find your way around the console
Your console opens on the dashboard. The Set up list shows what's left before you can launch, and the next thing to do.
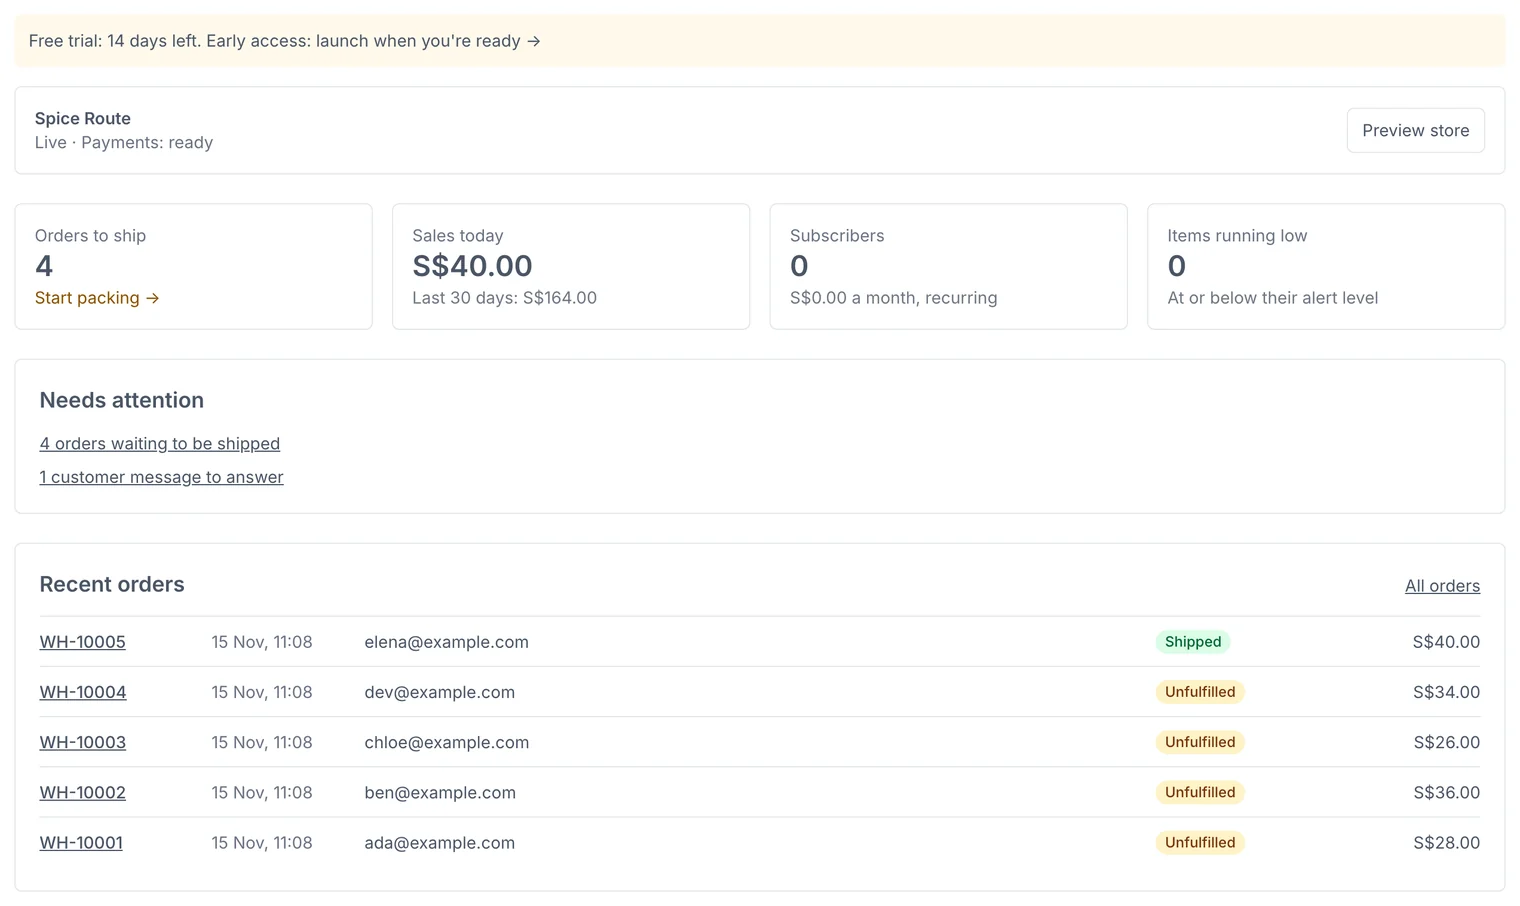
- Orders, Products, Subscriptions and Customers & marketing are the day-to-day screens.
- Online store holds your theme, pages, blog, menus, SEO and domain.
- Settings has your business details, payments, shipping zones, billing and team.
Next: work through the launch checklist.
Related guides
- Launch checklist
What your store needs before it can go live, and how to launch it.
- Store settings
Business details, logo, emails, GST, returns, languages, currencies and search settings, one section at a time.
- Add products, sizes and photos
Create a product, give it sizes with their own price and stock, add photos, and publish it.
Still stuck? Contact support or email [email protected]. We reply within one business day.